
COMMENT CHOISIR DES SKIS POUR LA HAUTE MONTAGNE
Choisis les meilleures planches pour le terrain qui t’inspire.
Tu as un compte ?
Connecte-toi pour passer à la caisse plus vite.
Add 100 EUR more to quality for free Shipping!
€0,00 EUR
MERCREDI, 20 DÉCEMBRE 2023
Aluminum is Lighter than Steel
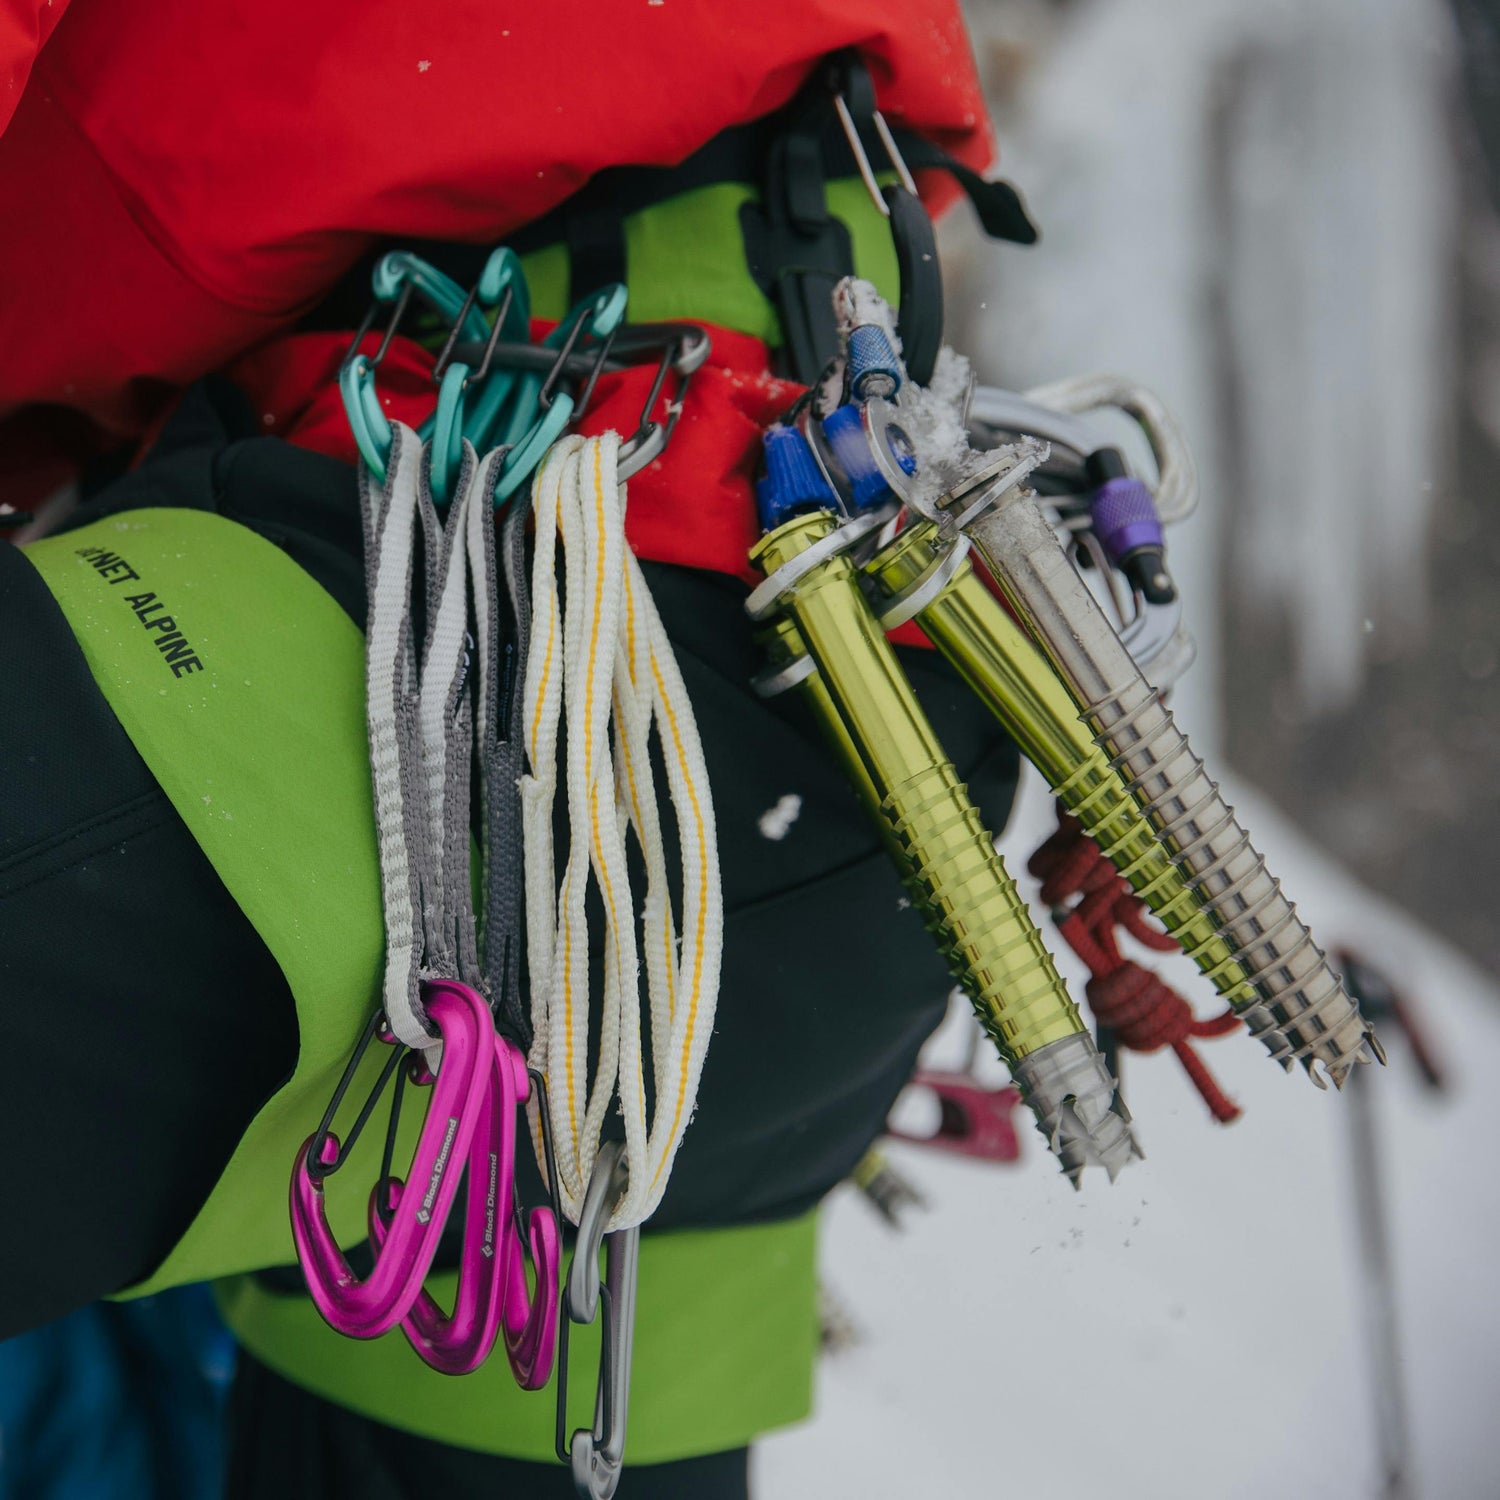
When aluminum ice screws first came onto the scene, the attraction of a lighter weight rack caused many climbers to fully switch over. The weight savings spread across a full rack of 14 screws can be upwards of 800 grams. That is serious weight, especially when it’s hanging off your harness on a steep and technical lead, or on your back for a five-hour approach.
Ultimately this means you could bring more food, more gear, or that huge belay parka, all of which may lead to more success and less suffering. But, other than weight, what are the other performance differences between aluminum and steel ice screws?
Both aluminum and steel ice screws, 13cm or longer, are CE certified and meet the EN 568:2015 10kN (2248 lbf) radial strength requirement. Although the stubby 10cm steel ice screws are not CE certified, they also meet the 10kN radial strength requirement. To put this in perspective, let’s imagine your friend Ken weighs 225lbs when loaded up with all his kit. A well-placed ice screw is rated to hold 10 Kens. It is hard to generate that much force in most real-world climbing scenarios.
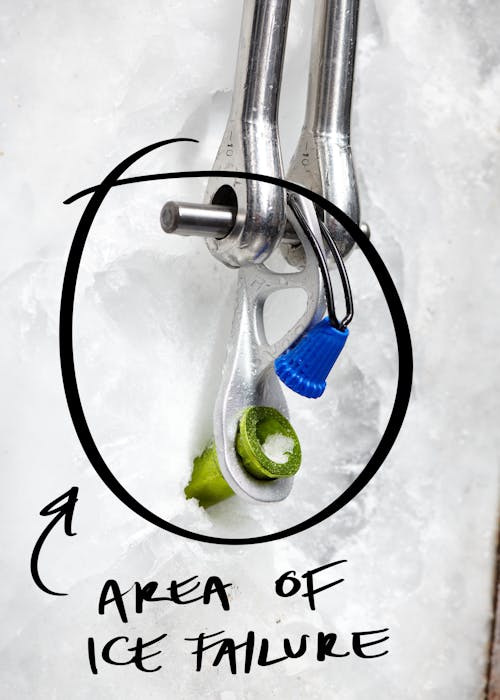
Ice screws themselves are very strong, but they rely on the support of the surrounding ice which can be highly variable, especially at the surface. In a textbook placement, with the screw placed at a slightly positive angle (tip higher than the hanger) and the hanger flush to the ice, an applied load will stress the ice surrounding the screw and eventually cause the ice to fail. The surface ice will fracture roughly 3 – 5 centimeters deep surrounding the body of the screw. Once this occurs, the exposed section of the screw body becomes cantilevered and is no longer supported by ice. The now cantilevered screw body, unable to support the load alone, will begin to bend until the hanger is levered off the head, the screw body fails, or the screw pulls out of the ice.
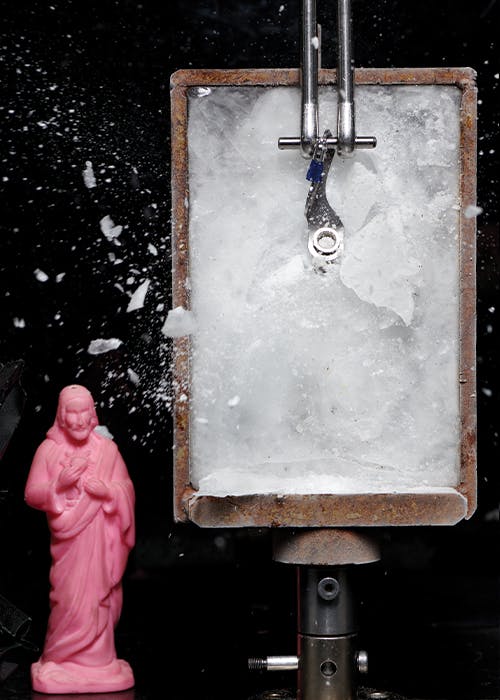
Comme la vis pour glace n'est aussi solide que la glace qui l'entoure, placer une vis dans une glace imparfaite peut provoquer une rupture de la glace et la faire se déformer sous des charges beaucoup plus faibles, ce qui conduit à un corps de vis non supporté et en porte-à-faux. C'est là que le matériau et la géométrie font une différence significative.
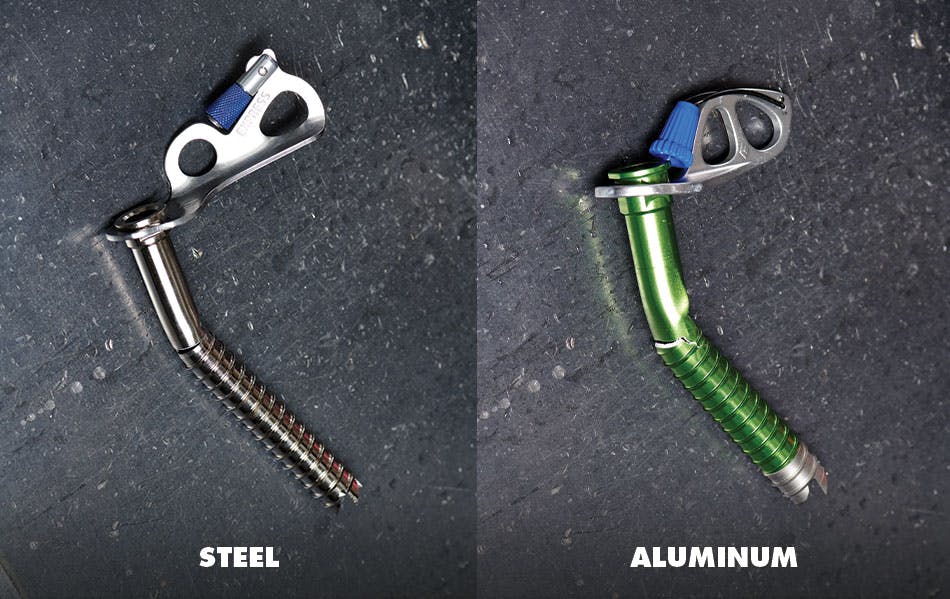
Sans trop rentrer dans les détails, l'acier offre une ductilité et une résistance supérieures à l'aluminium trempé utilisé pour les vis à glace. En gros, ça signifie que les vis en acier peuvent se plier et se déformer davantage que les vis en aluminium avant de céder.
Priorités de conception
Cela ne raconte pas toute l'histoire, cependant. La géométrie et les priorités en matière de conception jouent un rôle énorme dans cette discussion. Quand Black Diamond a conçu, il y a bien longtemps, l'éperon de glace Express en acier, la priorité était de créer un véritable cheval de trait robuste et durable. En revanche, les éperons de glace en aluminium BD Ultralight (UL) ont été conçus pour être... ultra-légers. Les deux conceptions respectent, bien sûr, les exigences de résistance de 10kN, mais les priorités de conception diffèrent – c'est l'outil adapté à la tâche.
Un exemple évident des différences de géométrie est le diamètre des corps de vis. Comme l’aluminium est un matériau plus faible, le diamètre de la vis à glace UL est plus grand pour maintenir la résistance requise afin de satisfaire aux exigences CE. Le diamètre plus important peut constituer un avantage lors de la posevis re-percéesCela peut également faciliter l'alignement des trous lors du perçage de filetages à vif, et les trous de plus grand diamètre font qu'il est moins probable que ta corde se coince quand tu la tires.
Evaluating Ice
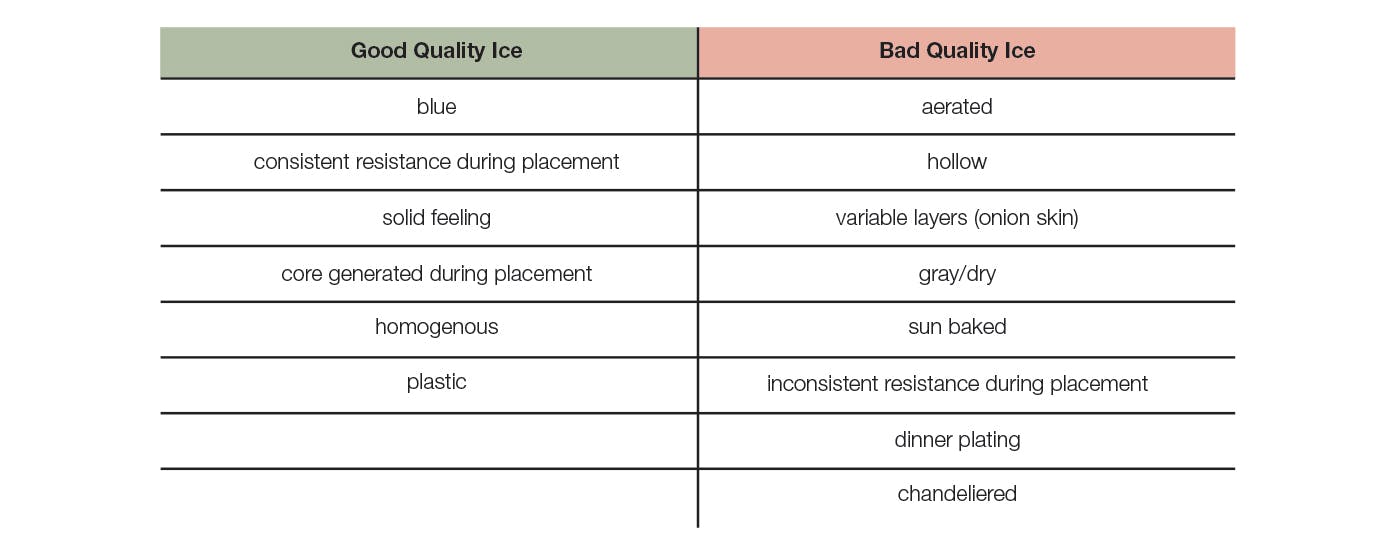
First, search for that nice homogenous, blue, plastic ice. Then, when placing the screw, pay attention to how much torque is required to turn the screw. You will generally feel consistent resistance during a placement in good ice. If you feel any significant reduction in the torque required to drill the screw, you may have hit a weak layer or an air pocket. If it’s taking a little force to turn the screw and that force is consistent all the way until the hanger meets the carefully cleaned surface ice, then we likely have a very good screw. Good screw placements also generally produce a core during placement.
Ice Quality
If the surface has been hit with sun, heat, or has lost density through sublimation (big word for what happened to your ugly white ice cubes in the freezer after a few months) then it is a lot weaker and will fracture more easily which increases the likelihood of relying on a cantilevered screw body. So, make sure to clean any weak surface ice off before placing your ice screw!
Ice Thickness
Gauge the thickness of the ice. You want to be able to bury the screw to the hanger into good ice without the threads banging into the rock and damaging your screw. And of course, ideally you don’t want the screw protruding from the ice (see screwtusion).
Wet Ice or Very Cold Ice
Aluminum screws tend to bind more on very cold days, or in ice with layers of different temperatures (really wet ice).
At the end of the day, when faced with the situation of placing an ice screw in sub-optimal ice conditions you should search elsewhere to find a better placement. You may have more buffer with a steel ice screw but relying on ice screws in marginal ice is not a good strategy. Taking the time to get good screw placements is very important! The best option, whether you are using steel or aluminum, is to get down to that nice blue plastic ice we all love to see.
Monde réelC'est à nous, en tant que grimpeurs, de choisir les meilleurs outils pour le boulot et de connaître les limites de notre équipement.
Beaucoup de gens ici chez BD, moi y compris et des athlètes comme Will Gadd, utilisent un mélange de vis à glace en aluminium et en acier selon l'objectif. Comme ça, tu peux profiter des avantages offerts par les deux modèles. Re-perçage ? Sors la vis à glace en aluminium avec le diamètre extérieur plus grand. Tu fore des filets avec ta vis de 23 cm ? Prends la vis en aluminium pour faciliter l'alignement de ces trous et alléger l'ensemble. Partie pour une balade sur glacier ? Emporte ces vis en aluminium et gagne en légèreté. Pour une expédition en pleine nature où le poids est roi ? L'aluminium, c'est la base.
Tu te retrouves face à un tas de glace douteuse ? Sors ta vis en acier pour augmenter tes marges ou, mieux encore, demande-toi si grimper cette voie en vaut vraiment la peine. Savoir quand il faut se retirer plutôt que de risquer une chute sur un équipement juste moyen est crucial pour rester en sécurité en montagne.

Choisis les meilleures planches pour le terrain qui t’inspire.

Inspirés par l’escalade, façonnés à la main, nos motifs Printemps 2026 racontent une histoire plus...
Inspirés par l’escalade, façonnés à la main, nos motifs Printemps 2026 racontent une histoire plus profonde.

Conseils essentiels d’entretien et de réparation sur le terrain pour tes peaux d’ascension, proposés par...
Conseils essentiels d’entretien et de réparation sur le terrain pour tes peaux d’ascension, proposés par notre équipe Reroute.

Regarde Connor enchaîner une autre voie mythique sur la falaise Empath à Kirkwood, en Californie.


Compose ta tenue outdoor idéale, que ce soit sous un grand ciel bleu ou en...
Compose ta tenue outdoor idéale, que ce soit sous un grand ciel bleu ou en pleine tempête de neige.

Black Diamond Athlete Angela Hawse est une guide pour le changement.

L’essentiel à emporter pour chaque style de ski de randonnée.


Suis l’athlète BD Yannick Glatthard au cœur des Alpes suisses pendant qu’il fait découvrir ses...
Suis l’athlète BD Yannick Glatthard au cœur des Alpes suisses pendant qu’il fait découvrir ses montagnes natales à ses amis proches.

Choisir le bon gant pour ta prochaine aventure hivernale.

Suis Dorian Densmore et Mya Akins pour une nouvelle saison hivernale sur les arêtes raides...
Suis Dorian Densmore et Mya Akins pour une nouvelle saison hivernale sur les arêtes raides d’Alaska, les couloirs secrets du coin et des aventures profondes en montagne.

On est là pour t’éclairer sur les lampes frontales.

Regarde l’athlète BD Alex Honnold envoyer du lourd sur du trad engagé, perché au-dessus du...
Regarde l’athlète BD Alex Honnold envoyer du lourd sur du trad engagé, perché au-dessus du lac Tahoe.

